Feeling the heat these last few weeks?
The dry season has already resulted in hot spots appearing, and it’s extremely uncomfortable walking even a few metres after parking your car.
At home, you are probably running your air-conditioner more frequently too. But the comfort you get from your air conditioner may be costing you. Not just in terms of money, but at the expense of your health as well.
Table of Contents
Why a dirty aircon is bad for you
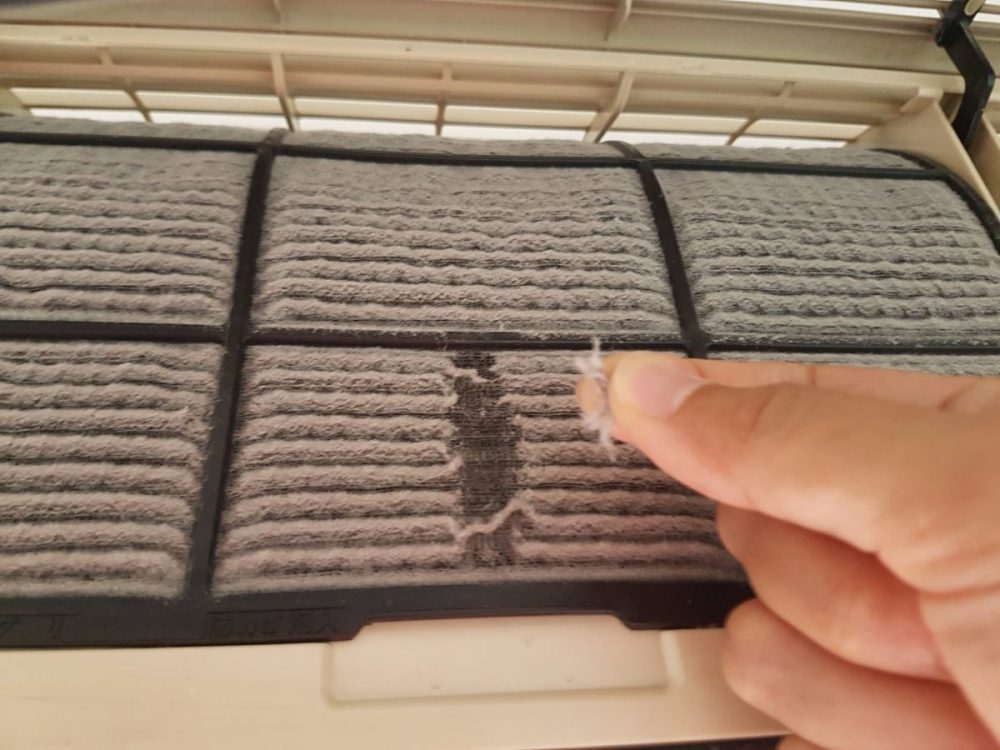
Over time, due to the frequent usage, there will be a lot of dirt, dust, and mould clogged up in the AC components, particularly on the filters, vents, and the rotary blades.
This is similar to what happens to your table fan after a while. The edges of the fan blades get caked with dust. But unlike a fan, you won’t notice the dust building up in your ac unless you check it regularly.
Dirty aircon filters will restrict the amount of air flowing through the unit, and force the air conditioner system to work harder in maintaining sufficient airflow. This consumes more electricity. It will also take a longer time for the AC to reach the desired temperature.
An overworked AC unit is also at risk of wearing out its circuitry or mechanical parts which will eventually be the cause of early system breakdown.
A poorly maintained AC can also impact your health. The air circulating through the ac blower unit may get contaminated with fine dust particles, or fungus spores, which can cause lung issues such influenza, asthma or pneumonia. Besides respiratory problems, a dirty AC can worsen dry skin and chronic illnesses, too.
How to clean your air conditioner
To keep your aircon in good working condition, you should clean it regularly. And hiring a professional aircon cleaning service every 6 months is the best way to keep your aircon clean.
But if you really want to minimise the amount of dust building up inside your aircon, you can still learn how to clean your air conditioner in between visits from the professionals.
Don’t worry, you won’t void your aircon warranty as long as you don’t unscrew the panels. Just follow the steps below.
However, do note that the steps below show you how to clean the indoor unit only. These steps should not be used as a replacement for proper servicing altogether. You should still get a professional aircon servicing to clean your indoor blower unit as well as your outdoor compressor every 6 months or so.
1. Clear the area below the aircon unit (or cover it)
As you clean the aircon, lots of dust will start to drop out. If your aircon unit is above your bed, the dust will get on your bedsheets. So make sure you clear the area below, or cover it with newspaper.
2. Unplug the power and open the outer case
Before you touch the AC cover, ensure that you have turned the power off and unplug the cord from the power source.
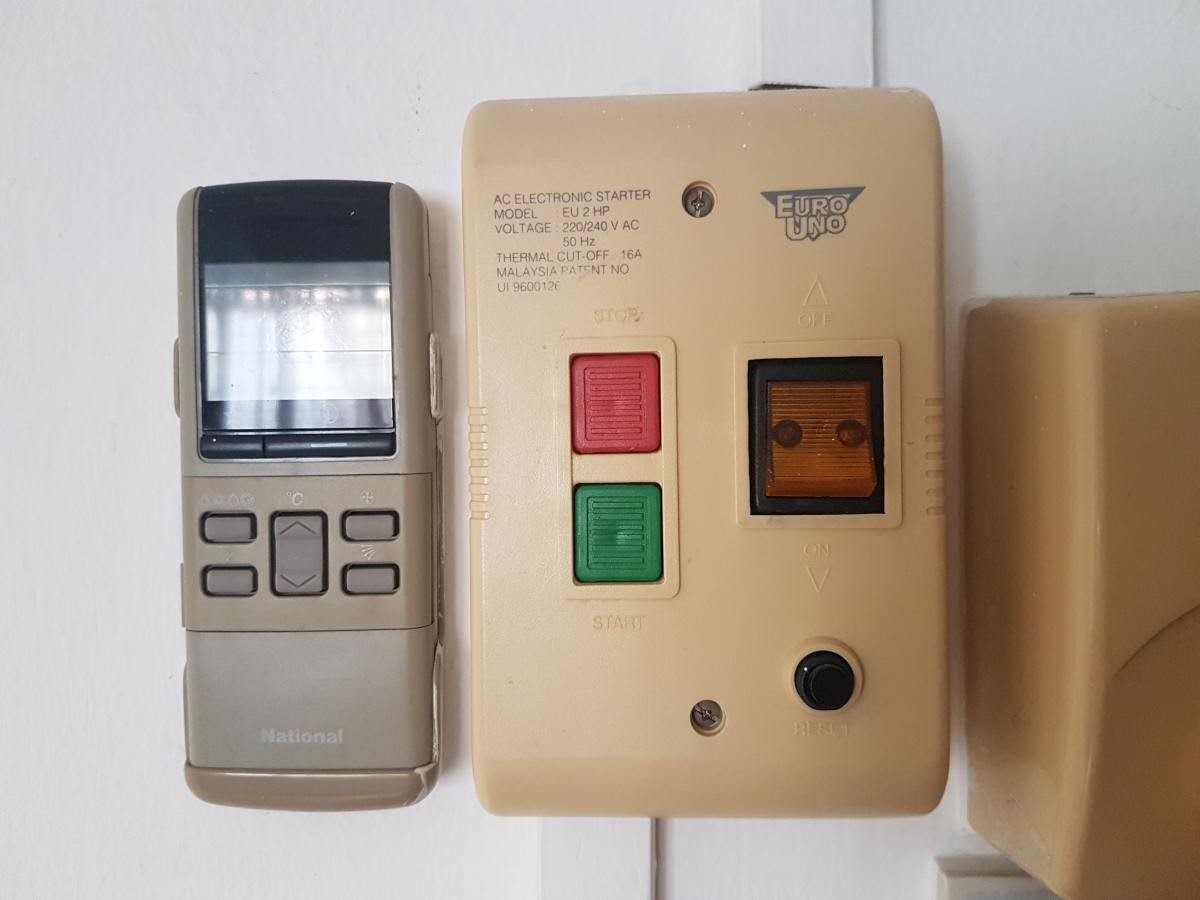
Locate the wall switch for the aircon and turn it off. This switch usually comes with a red indicator light. In older units, you may also need to switch off the magnetic starter unit (see image below). It’s usually a big white box with a green and red on/off button.
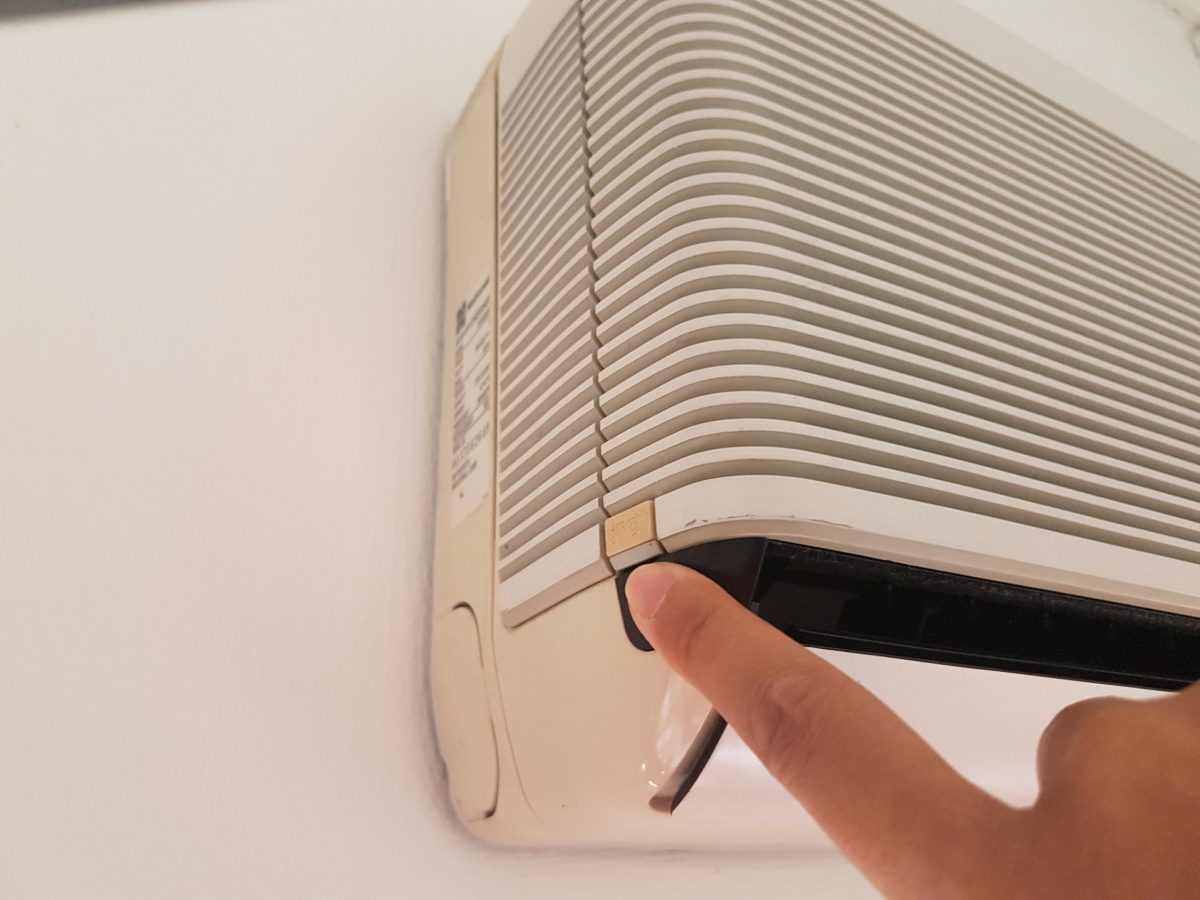
Then, lift up the outer case to expose the filters underneath. Some aircon units have a button on each side to press before you can lift the case.
2. Remove indoor unit filters, then wash and dry them
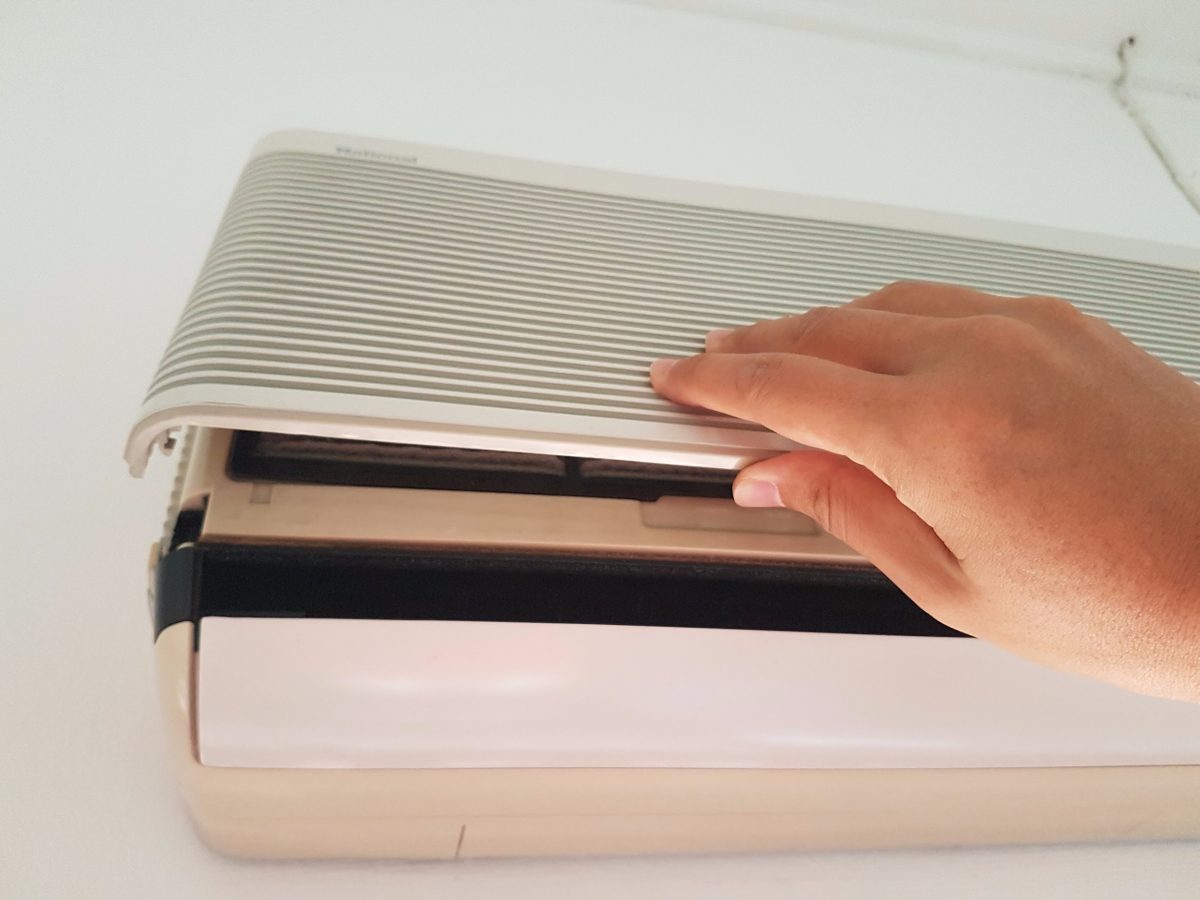
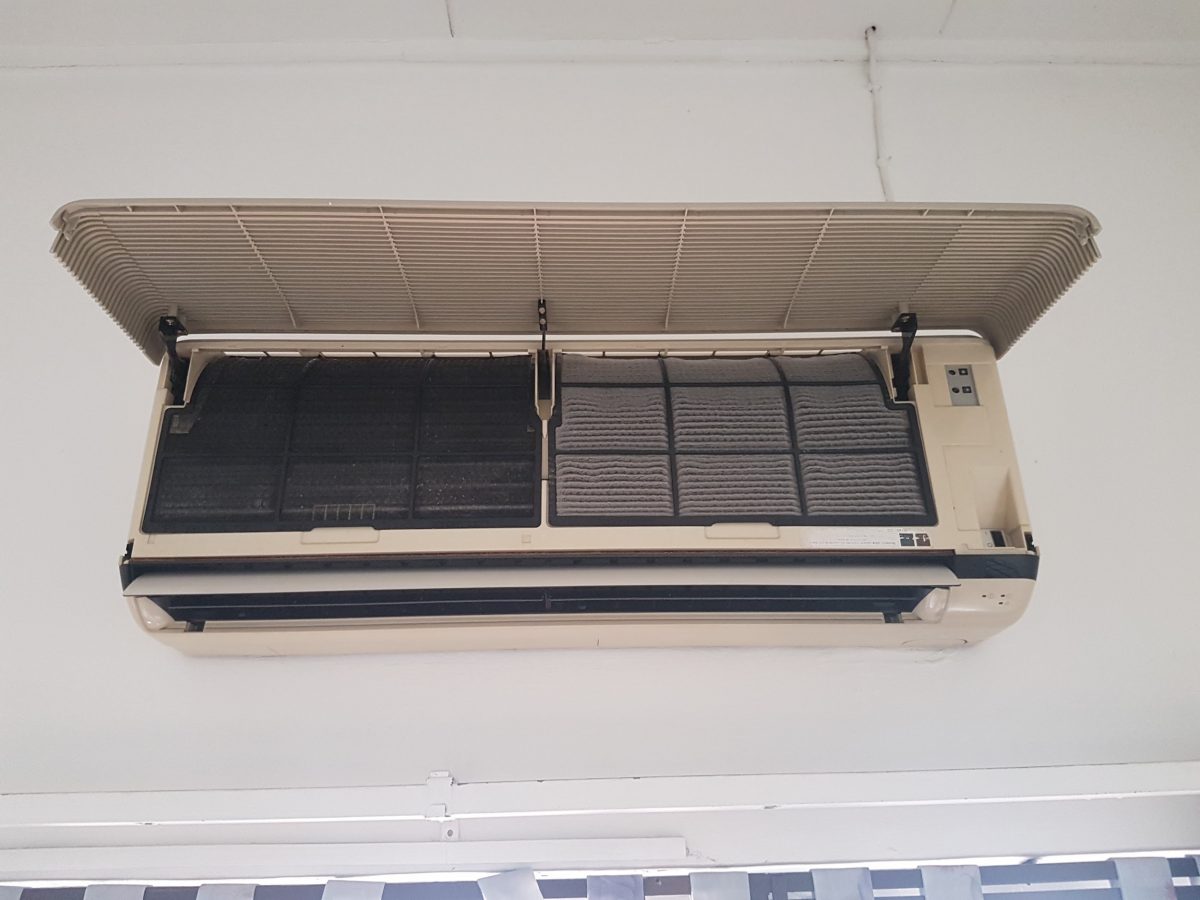
After you’re sure the AC is not plugged to the power source, open the outer plastic casing so that you’ll have access to the air filter inside. You can easily remove the front cover by gently lifting each side of the cover attached to the main body until it swivels upwards.
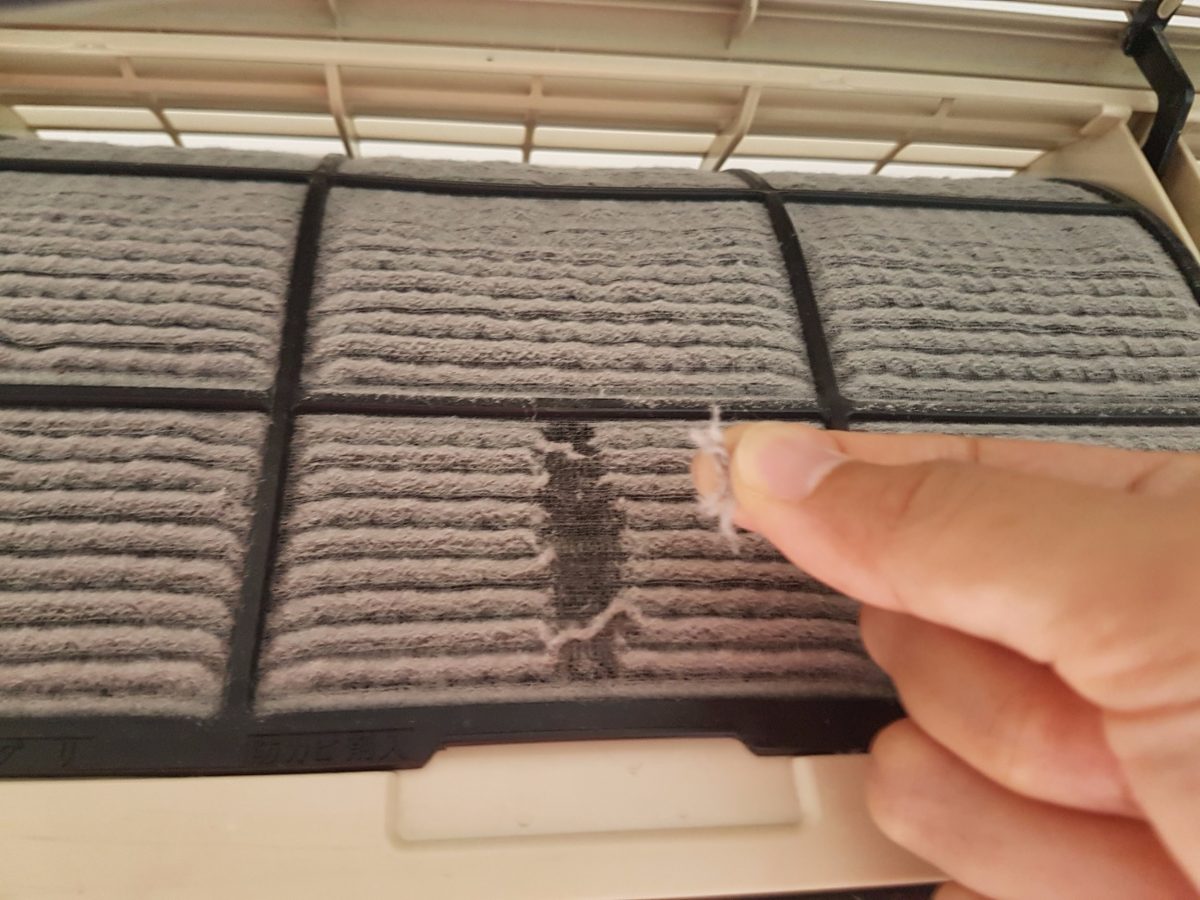
Now you see an AC component which looks like a net; that is the AC filter. This is the first line of defence preventing dust from entering the system. So, that is why this part is most likely to be dirty very quickly.
What you need to do now is to clean the filter by just simply taking off the filtering net, and wash it under running water until there is no dust on it. Don’t brush it or else you may tear the mesh. Leave it somewhere to dry while you tackle the rest of the unit.
3. Remove the AC louvres, or swinging directional fins
The next part to clean is the louvres. The louvres are the thin, flat fins that move up and down to distribute cool air all around the room.
Most AC models allow its louvre, or air direction fins to be detached easily. Just take it off, and wipe away any dust on its surface. If not, just clean this part as carefully as possible while it’s attached.
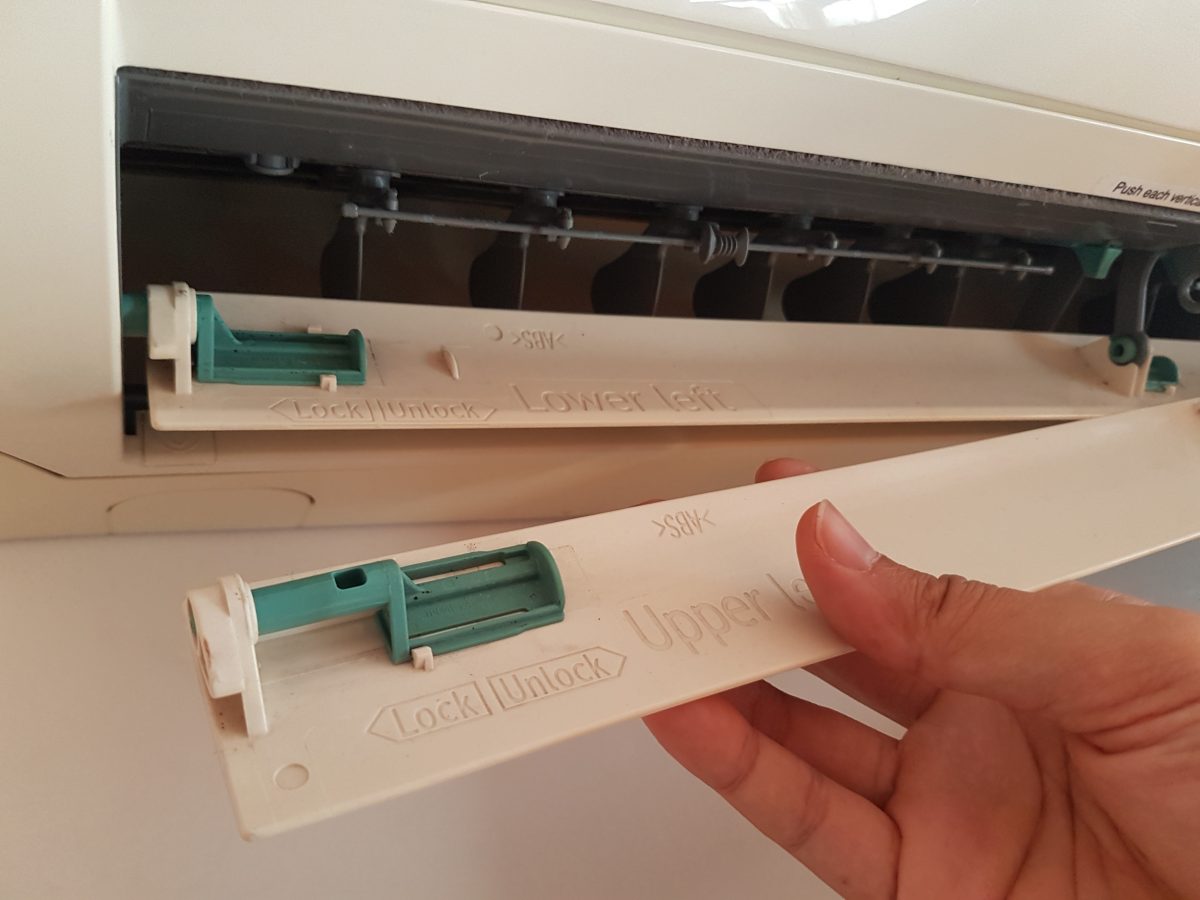
4. Clean the inner directional fins using a damp cloth
Having removed the louvres, you’ll see the second layer of air direction fins. These are the ones that direct the air to the left and right.
Some models allow you to detach them, or swivel them to the side. This makes it easier to wipe with a damp cloth. It also exposes the next item on this list, the axial, or rotary fan blades.
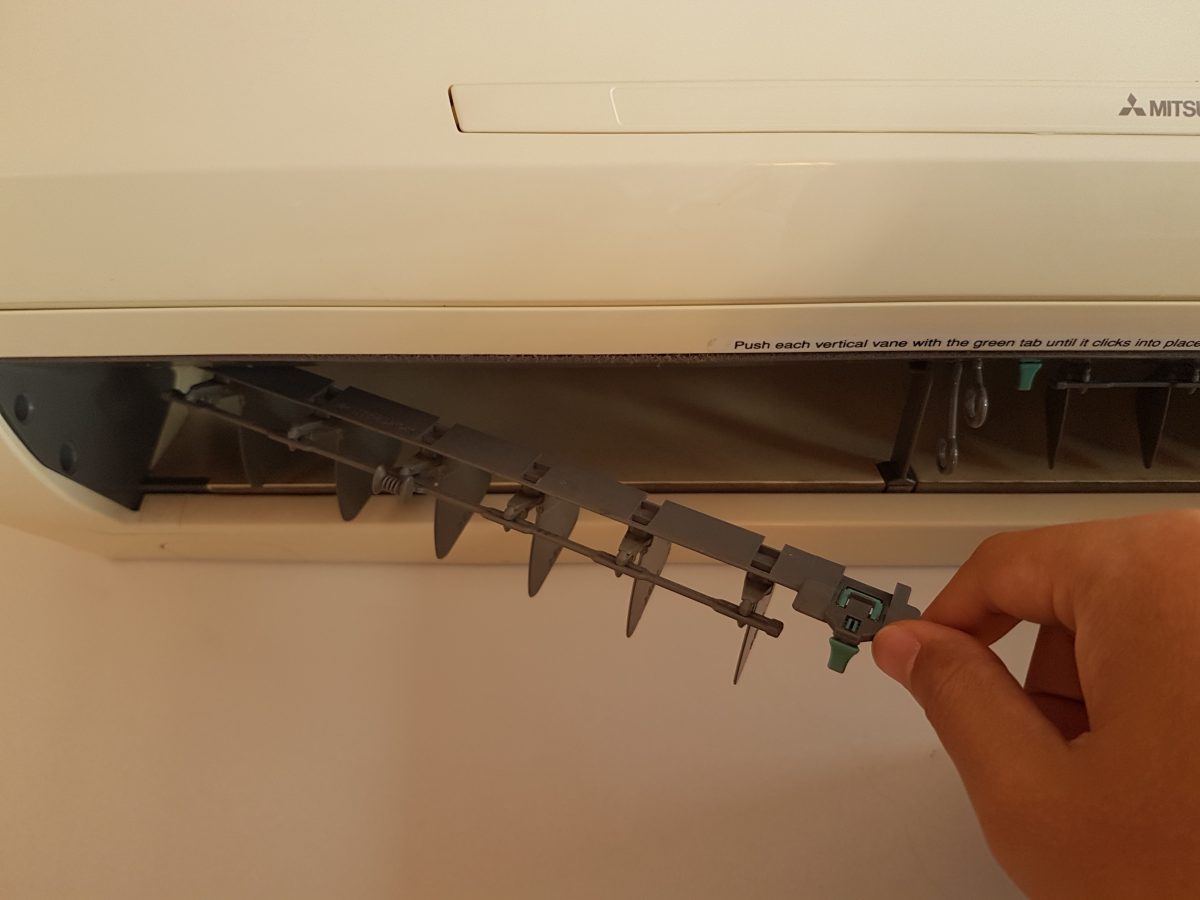
5. Clean the rotary fan blades
The rotary blades hidden behind the air direction fins can be clogged up with dirt and dust, too. But since they can be hard to reach, they are often overlooked during DIY cleaning.
If you can access it, just give it a brush with a soft toothbrush or hand brush to loosen caked dirt, or vacuum with a brush attachment.
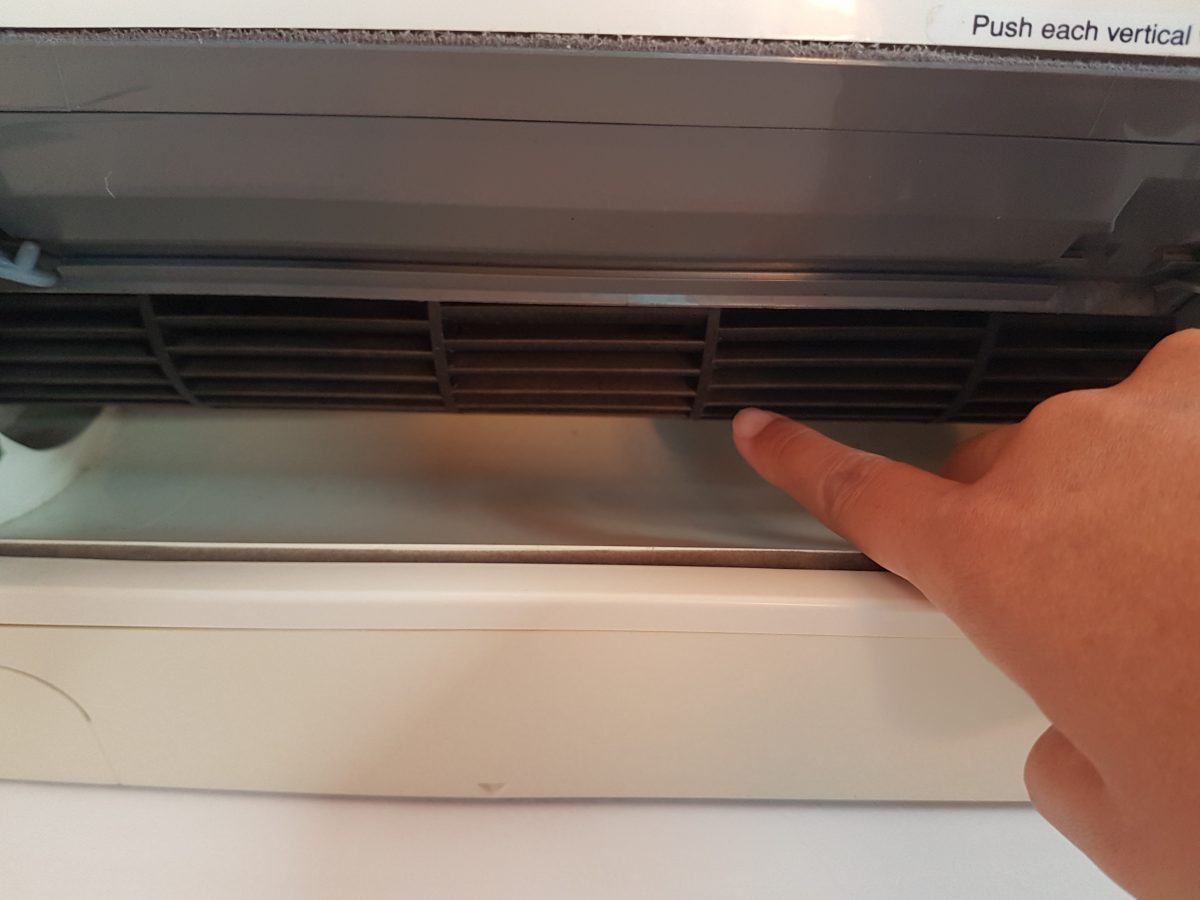
If you can’t access the rotary blade, give it a brush with a long toothbrush to loosen any dirt. It won’t be as easy, but at least you will remove as much dirt as you can.
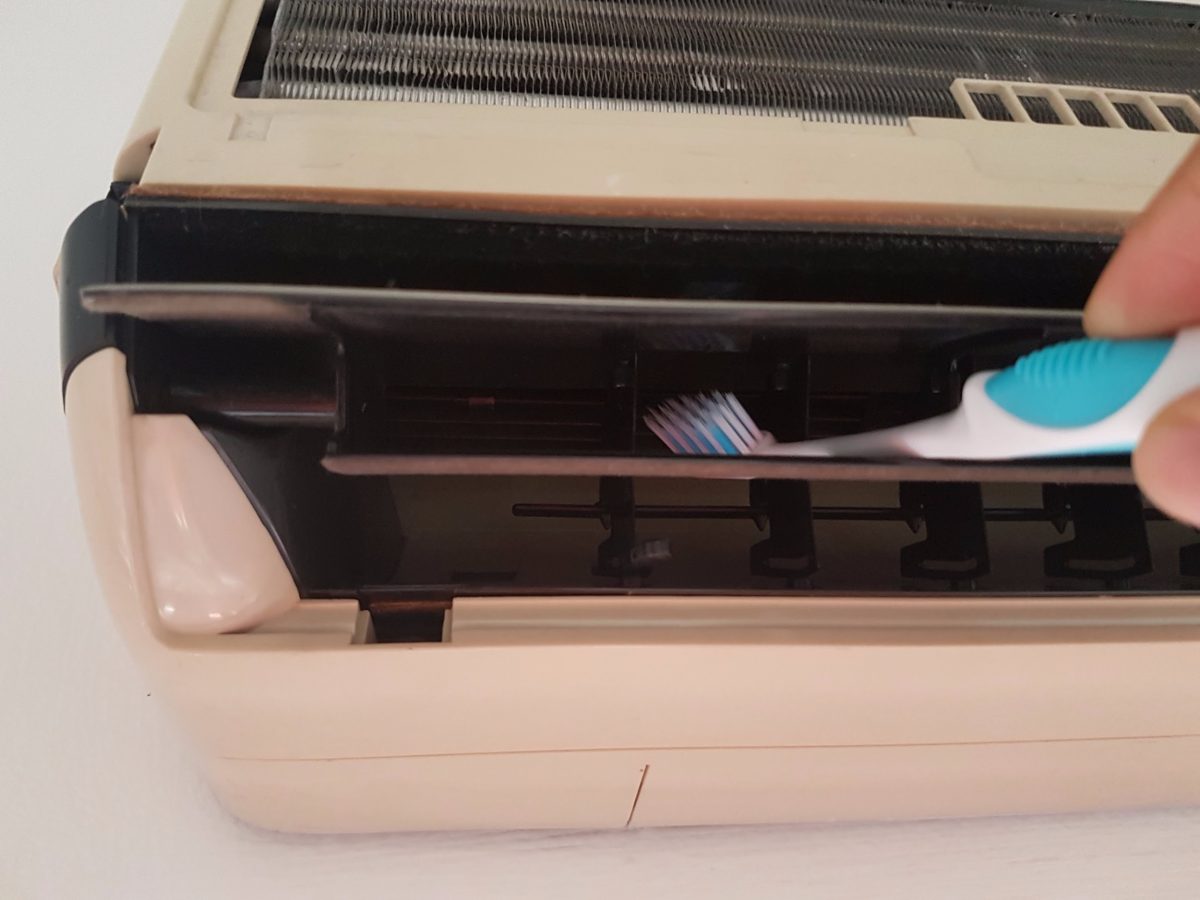
6. Brush the cooling fins
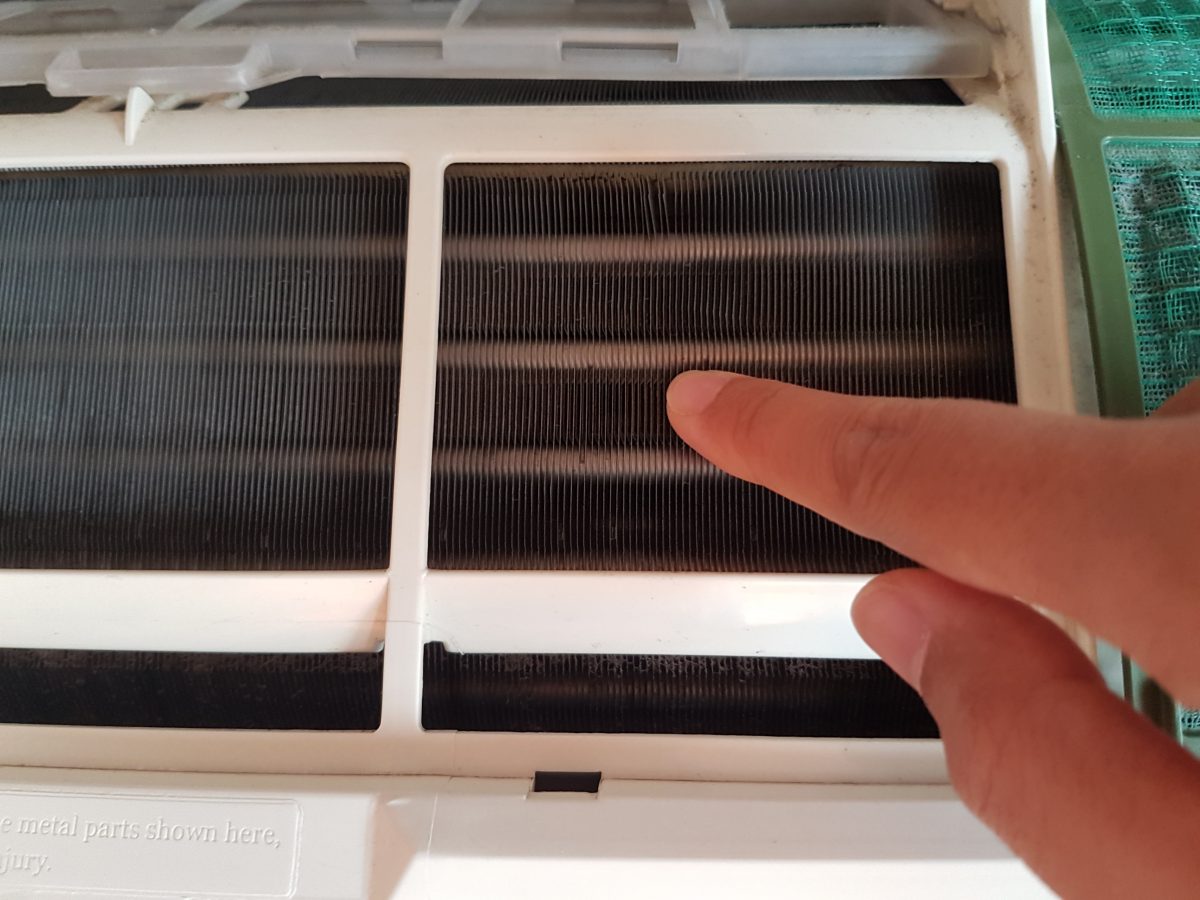
Under the air filter nets, you will see a panel consisting of thin fins. These are the parts that cool the air as it passes through your unit.
Vacuum this part with a brush attachment tool. Because this component is the coldest part of the aircon, water can condense on its surface and mix with the dust, forming a sticky paste that is hard to remove. To remove, run an old toothbrush along the fins to loosen the grime.
Don’t brush across the fins, or you will bend them out of shape.
7. Reassemble the parts
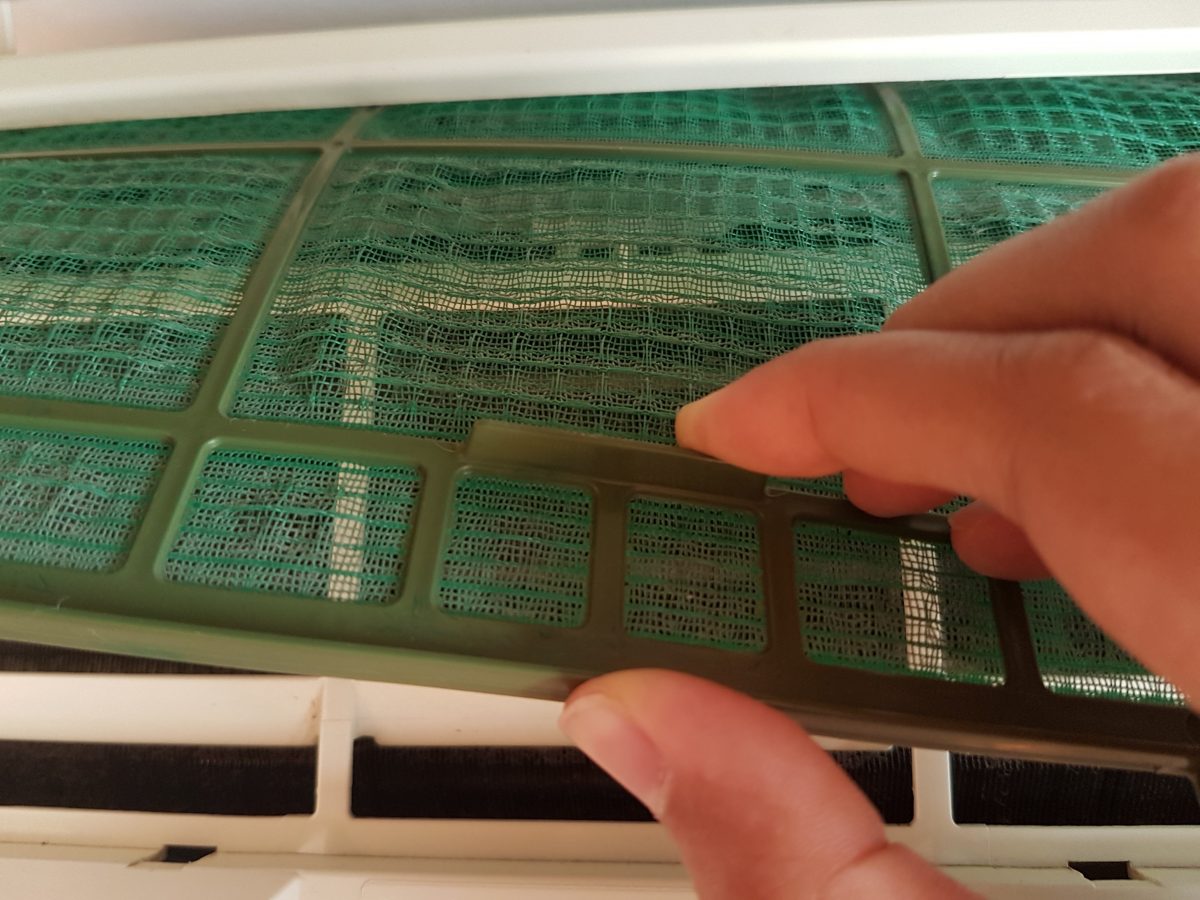
Once done vacuuming all the grime away, it’s time to put back the directional fins and filter to where they belong. Make sure that each part is secured properly.
The filters and fins need to be put in the correct way. Each filter should be marked “front left” and “front right” to make it easier to reassemble.
8. Switch on and test if the AC is working properly
You can now plug the AC back into the power socket. Turn it on at full blast to blow out any loosened dust and vacuum it off the floor.
If you’ve followed each step above carefully, you should now have a much cleaner AC, without voiding any warranty. You should aim to do this routine maintenance at least once every two months.
For a thorough and effective cleaning, hire a professional air conditioner serviceman
Though you now know how to clean your air conditioner without voiding your warranty, bear in mind that these tips will only help you clean the outmost dirt of the air conditioner. For more thorough AC cleaning, you should hire a professional. A professional aircon servicing will clean the outdoor compressor, as well as ensure that no blockage occurs (which may cause leaks).
To find a reliable and professional aircon servicing company, submit your request at Recommend.my.








Thanks for the great guide in cleaning your air conditioner. I would suggest that you change or clean the filter on the inside unit for at least every thirty days. The air on your unit will move a lot easier, thus increase efficiency, and decrease the risk of freeze up. If you had a problem with your air conditioning unit that doesn’t cool, you might want to check this link.
Pingback: How often do you really need to service your aircon? | Recommend.my
Great post! These are some really easy things to check. At this point in the year, you should be able to look back on the summer’s cooling bill. As an AC unit wears and ages, it begins to run less efficiently. When it runs less efficiently, your bill goes up. Any of these tips may fix a minor problem, or help maximize the life of your unit.
Very impressive, thanks a lot for sharing a helpful post with us.